
Welcome to CRS!


Frequently Asked Questions
Since CRS operates as a wholesale distributor, all pricing details will be furnished by your chosen stone fabricator. A fabricator serves as a sub-contractor responsible for templating, fabricating, and installing the stone, and they can provide you with a comprehensive cost estimate for the entire project. If you are collaborating with a trade professional, such as a sub-contractor, builder, or designer, they likely have a dedicated fabricator with whom they work closely. It is through this fabricator that you will obtain a turnkey cost for your project, ensuring a seamless and well-coordinated process from start to finish.
Our highly efficient automated system allows us to expedite the process significantly. Once we have received all the necessary information about the fabricator or contractor, rest assured that the pricing will be sent to you on the very same day.
We recognize that material selections are often planned well in advance, and to accommodate our clients, we have implemented a highly customer-friendly hold process.
During your visit, you can request a temporary hold, which will be valid for two weeks from the hold date. If needed, a one-time extension of an additional week can be granted if you contact CRS before the expiration date.
For longer hold periods, you can apply a deposit to reserve the material. For further information, please don’t hesitate to call our showroom at 512-640-6401.
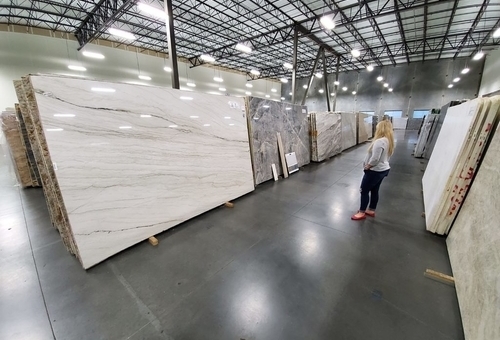
Hand-selecting natural stone slabs involves the meticulous process of personally inspecting and choosing each slab by hand.
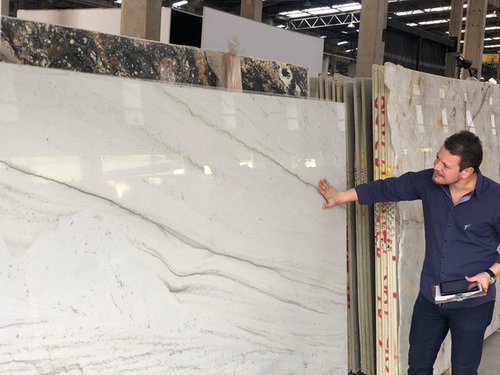
Each slab of natural stone is a one-of-a-kind masterpiece, displaying unique patterns and colors. While the variations between slabs are typically minimal, they can differ slightly. At CRS, we understand the importance of finding the perfect fit for your needs. Therefore, we gladly offer the opportunity for you to browse through a selection of slabs, ensuring that you can handpick the one that best matches your vision and requirements.
Our aim is to provide you with the ideal slab that will enhance the beauty and elegance of your project, leaving you completely satisfied with your choice.
While appointments are not obligatory, we highly recommend scheduling one to optimize your time and experience. With a scheduled appointment, we can ensure that the desired slabs are prepared and available for viewing before your arrival, streamlining the hand-selection process to be swift and efficient.
While it is feasible to hand-select slabs during your visit, the duration might vary depending on the warehouse workload. To guarantee a seamless and prompt selection, we encourage you to book an appointment in advance.
Our goal is to provide you with the best possible service and ensure that you find the perfect natural stone slabs for your project.
Within CRS, prices vary across different levels from A to G, with A representing the most affordable and G indicating the highest price range. It’s important to note that each level encompasses a price range, meaning that while not all stones within a level have the exact same price, they are closely priced. For precise pricing tailored to your specific project, your fabricator or contractor will be able to offer accurate information.
The price level does not necessarily correlate with the quality of our materials at CRS. We take great pride in sourcing only top-quality materials, each carefully inspected before being showcased in our showroom. Our priority is to offer first-choice materials across all price levels. The pricing is primarily determined by the type of stone, as well as its unique colors and patterns.
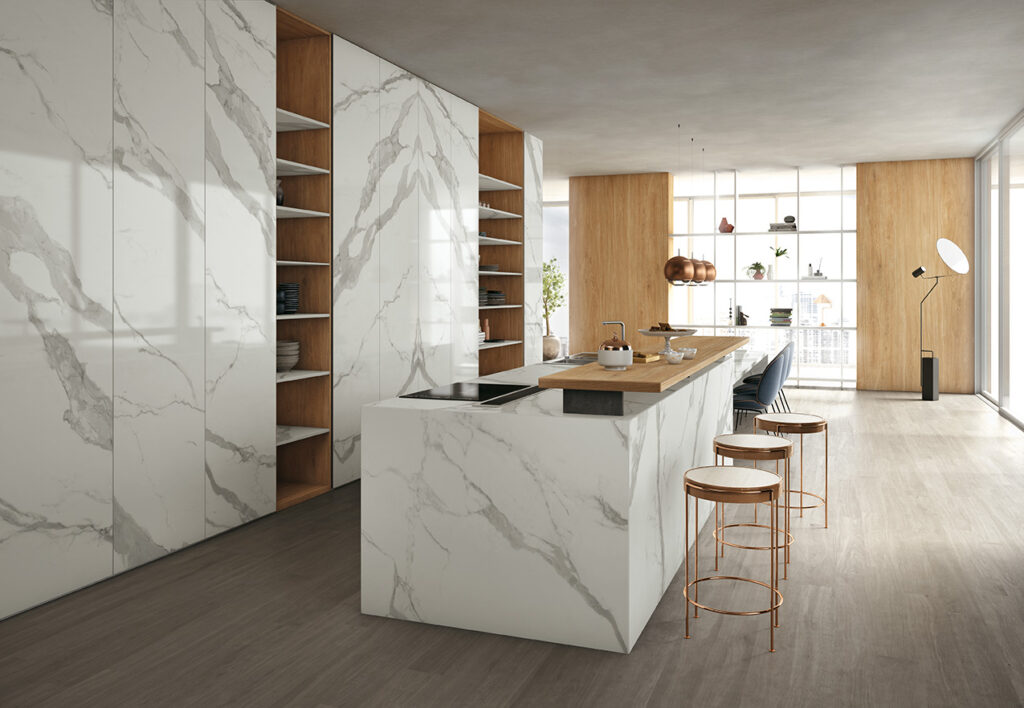
Natural stone countertops are made from various types of rocks extracted from the Earth. Common natural stone materials used for countertops include granite, marble, quartzite, soapstone, calcite, and dolomite.
The most commonly used natural stone materials for countertops are granite and quartzite, which are known for its durability and diverse patterns, and marble, renowned for its elegant veining and timeless beauty. Other popular choices include calcite and dolomite, with its unique colors and patterns, and soapstone, valued for its smooth texture and heat resistance.
Granite is one of the hardest natural materials on earth, which makes granite the most sought after natural stone for counter tops, vanities, flooring and many other indoor and outdoor uses. Composed of many different minerals primarily of quartz, mica, and feldspar, granite’s look is unique. This is because it is formed deep in the earth at extremely high temperatures. Melting minerals gives the granite its extreme variety of vibrant colors, wide range of patterns, and its durable strength.
Quartzite is a metamorphic quartz-based stone formed in exceedingly hard layers. In some deposits, intrusion of minerals during the formation process creates unusual coloration which is the reason for breath taking movements and variations in quartzite slabs.
Marble is a natural stone composed predominantly of calcite and dolomite or serpentine, depending on the color. Marble has stunning range of rich colors from snow white, or salmon, to coal black. Marble adds an elegant touch to vanity tops and fireplaces. Since marble is not as durable as Granite and Quartzite, it is not highly recommended for kitchen countertops.
Calcite and Dolomite are natural stones composed similar to marble, and are often mistaken for marble due to similarity in it’s looks. But since Calcite and Dolomite are not as soft as marble they are more durable for countertops, which makes them a popular choice amongst customers looking for a marble look but low maintenance.
When choosing a natural stone countertop, consider factors such as the stone’s durability, maintenance requirements, color options, and how well it complements your overall design and lifestyle.
Calcite and Dolomite are natural stones that bear a striking resemblance to marble in appearance, often leading to mistaken identities. However, unlike marble, Calcite and Dolomite boast a higher level of durability, making them excellent choices for countertops. These stones not only offer the sought-after marble aesthetic but also provide the added advantage of being low-maintenance, which has made them increasingly popular among customers seeking the perfect blend of elegance and practicality.
Yes, natural stone countertops, like granite and quartzite, are heat-resistant and can withstand high temperatures. However, it is essential to use trivets or hot pads to protect the stone’s surface. While natural stone is generally scratch-resistant, some stones, like marble and limestone, are more susceptible to scratches than granite or quartzite.
Regularly clean natural stone countertops with a mild soap and water solution, avoiding harsh chemicals that may damage the stone’s surface. Use cutting boards and avoid placing hot objects directly on the stone. Periodic sealing may be necessary for certain types of natural stone to prevent staining.
Some natural stones, like granite and quartzite, are suitable for outdoor use due to their resistance to weathering and UV rays. Softer stones as marble, calcite, dolomites, soapstone, etc. are not recommended for outdoor use.
Many natural stones, including marble, limestone, and some granites, are porous and may absorb liquids if not properly sealed. Sealing is recommended to prevent stains and moisture penetration. Non-porous stones like quartzite and soapstone generally require less frequent sealing.
The frequency of resealing natural stone countertops depends on the type of stone and its porosity. Generally, most natural stones, such as granite and quartzite, require resealing every 1 to 3 years to maintain optimal protection against stains and moisture. On the other hand, more porous stones like marble or limestone may need resealing every 6 months to 1 year.
As many different factors go into determining how often a stone should be resealed, it is best to consult with your fabricator.
With proper care and maintenance, natural stone countertops can last for several decades. Granite and quartzite countertops are especially known for their durability and long lifespan.
While natural stone countertops are hard and resistant to scratches, it is best to use cutting boards to avoid any potential damage to the stone surface and to preserve the sharpness of your knives.
Minor chips or scratches can sometimes be repaired with DIY kits or professional stone repair services. However, for more extensive damage or deep stains, it is recommended to seek the assistance of a professional stone fabricator or restoration specialist.
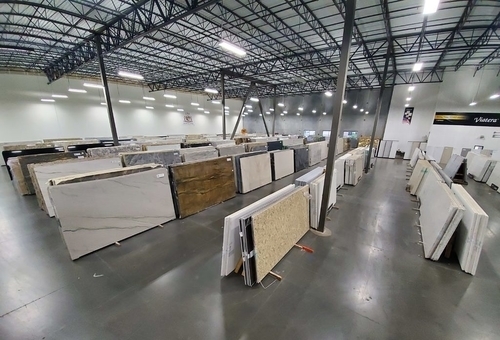
Warehouse Layout
")
Material Comparison Chart
")
Natural Stone is Sustainable
Through the Natural Stone Sustainability Standard, companies stepped up to show their commitment to sustainable quarrying and fabrication practices. However, without specific data, our messages often met with hesitation and disbelief by many professionals in the design/build world.
This changed with the Natural Stone Institute’s publication of three industry-wide Environmental Product Declarations, or EPDs, last fall.
To help quantify the embodied carbon of natural stone, the disclosures include cradle-to-grave life-cycle impacts for cladding, flooring, and countertops.
NSI’s results show that natural stone has a lower global-warming impact and lower embodied carbon than many man-made materials, including precast concrete, terrazzo, and engineered stone.


Aquatic Center
Comparison per m2:
Natural Stone GWP: 21.4 kg CO₂ eq
Precast Concrete GWP: 62.3 kg CO₂ eq
Total Project Impacts:
Natural Stone: 5,157 kg CO₂ eq
Precast Concrete: 15,014 kg CO₂ eq
Embodied Carbon Savings with Natural Stone:
9.9 metric tons CO₂ eq

Museum
Comparison per m2:
Natural Stone GWP : 22.0 kg CO₂ eq
Terrazzo GWP : 82.2 kg CO₂ eq
Total Project Impacts:
Natural Stone: 28,600 kg CO₂ eq
Terrazzo: 106,860 kg CO₂ eq
Embodied Carbon Savings with Natural Stone:
78.3 metric tons CO₂ eq

Hotel
Comparison per m2:
Natural Stone GWP: 46.8 kg CO₂ eq
Engineered Quartz GWP: 102.6 kg CO₂ eq
Total Project Impacts:
Natural Stone: 27,378 kg CO₂ eq
Engineered Quartz: 60,021 kg CO₂ eq
Embodied Carbon Savings with Natural Stone:
32.6 metric tons CO₂ eq
Mountain top to Countertop
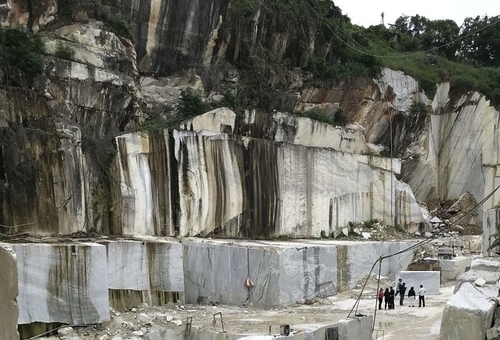
Step 1
The journey of your natural stone countertop starts off at, you guessed it – a mountain! Where else could we find such beauty? Natural stone is a one-of-a-kind material that can’t be manufactured.
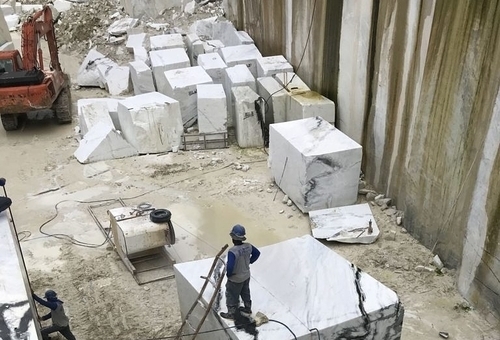
Step 3
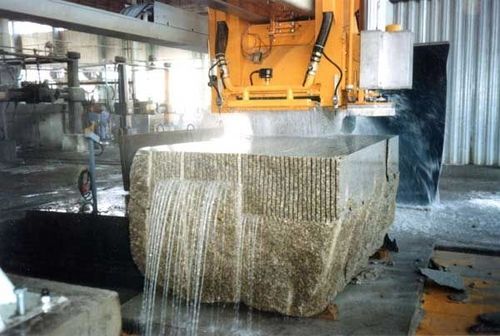
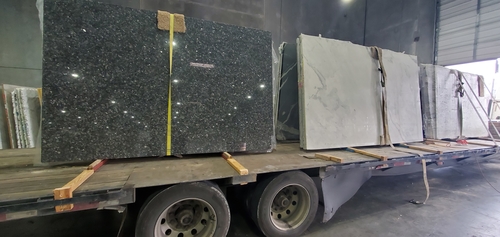
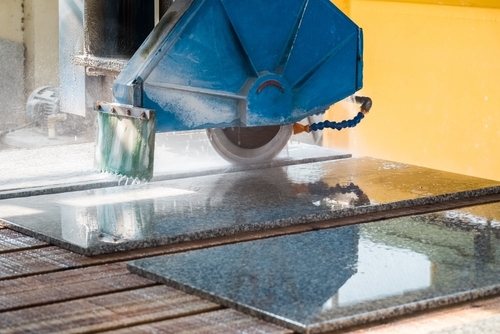
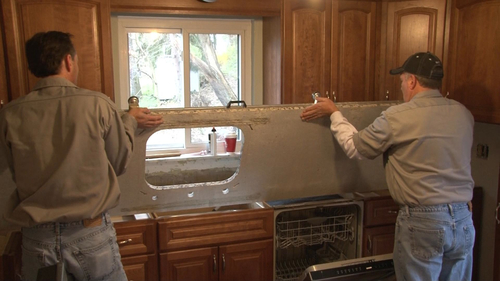
After extraction, the large blocks are transported to a factory so that they can be processed. Such transportation requires special trucks capable of carrying EXTREMELY heavy material.
Sealing your Natural stone
Step 1
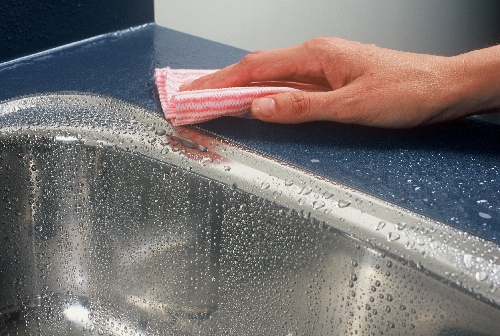
The water test is a quick and simple way to test if your natural stone countertops require resealing. Spray a few drops of water at the most used surface of your natural stone, usually around the sink, and leave it there 15 to 20 minutes before wiping it off. If the water is absorbed by the stone, it is time to reseal your countertops. But don’t worry because resealing your stone is a very quick, simple and inexpensive process. If no water was absorbed by the stone, you do not have to do anything and can go back to enjoying your one of a kind natural stone.
Step 1
The water test is a quick and simple way to test if your natural stone countertops require resealing. Spray a few drops of water at the most used surface of your natural stone, usually around the sink, and leave it there 15 to 20 minutes before wiping it off. If the water is absorbed by the stone, it is time to reseal your countertops. But don’t worry because resealing your stone is a very quick, simple and inexpensive process. If no water was absorbed by the stone, you do not have to do anything and can go back to enjoying your one of a kind natural stone.
Step 2
1. A sponge or cloth (lint-free is preffered)
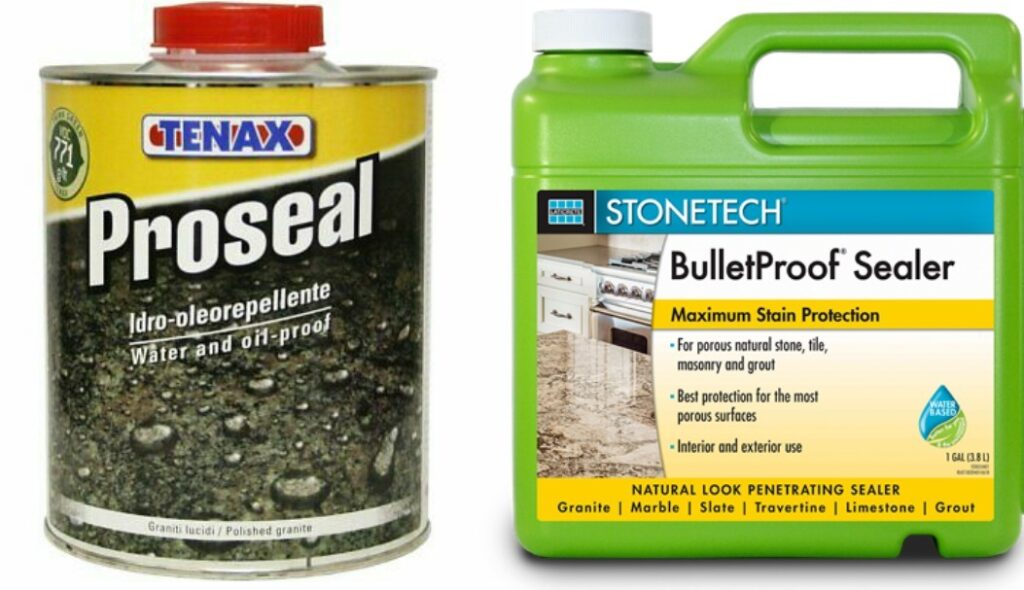
2. A stone sealer, Stonetech Bulletproof or Tenax Proseal is preffered
3. Granite cleaner or a mixture of soap and water
Step 3
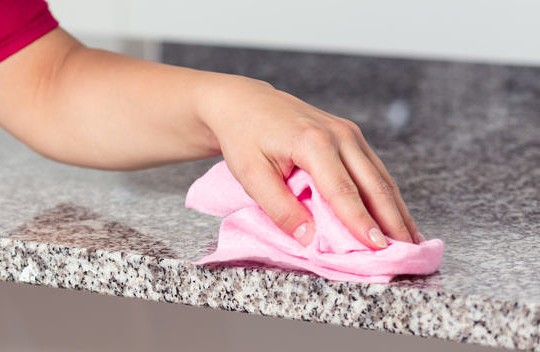
Use the stone cleaner or mixture of soap and water to clean the entire surface of the natural stone with a cloth. Let the surface dry fully before moving on to the next step.
Step 4
Once the surface is dry, use another clean sponge or a lint-free cloth to apply the sealer, make sure to wear gloves. Wet the cloth/sponge with the sealer, and gently apply the sealer to the entire surface. Pay attention to check which areas of the stone absorb the sealers fastest. Let the stone absorb the sealer for 15 to 20 minutes and wipe away any access sealer.
Step 5
Apply another coat of sealer to the entire surface, paying more attention to the areas that absorb the sealer fastest during the last coat. Check again to see which areas continue to absorb sealer faster. Let the sealer sit again for 15 to 20 minutes and wipe away any access sealer.
Step 5
Apply another coat of sealer to the entire surface, paying more attention to the areas that absorb the sealer fastest during the last coat. Check again to see which areas continue to absorb sealer faster. Let the sealer sit again for 15 to 20 minutes and wipe away any access sealer.
Step 6
Repeat steps 5 and 6 until the entire is surface is no longer absorbing the sealant. At that point your stone is fully sealed and protected. Depending on the stone, it may take anywhere from 2 to 5 coats to fully protect the stone. Extremely soft stones like Marble may even require more then 5 coats.
Step 7
Now that your stone is fully sealed, it will be protected from spills and day to day wear and tear. You can do the water test periodically to check if resealing is required, most sealers now are made to last several years. Avoid using any cleaning products with chemicals in it such as Windex, 409, etc. to avoid resealing quicker.
Feel free to call us anytime if you have any questions about protecting or maintaining your natural stone.